The original Ender 3v2 has many areas which can be improved on the Y Axis. The Y-Axis is carrying a high wait – the bed – and the print. One of the most important change in my point of view is the change to precision rails.
There are basically 3 different rail designs for the Y Axis of the Ender. I do not want to go into the details of other non-rail designs, because I personally have the best experience with rails and I think they are the best (but maybe a bit more expensive) solutions for 3D printers in general.
Lets look at the following different solutions and why I like the one I pick for my printer the most:
1 rail on the side of the aluminium-profile
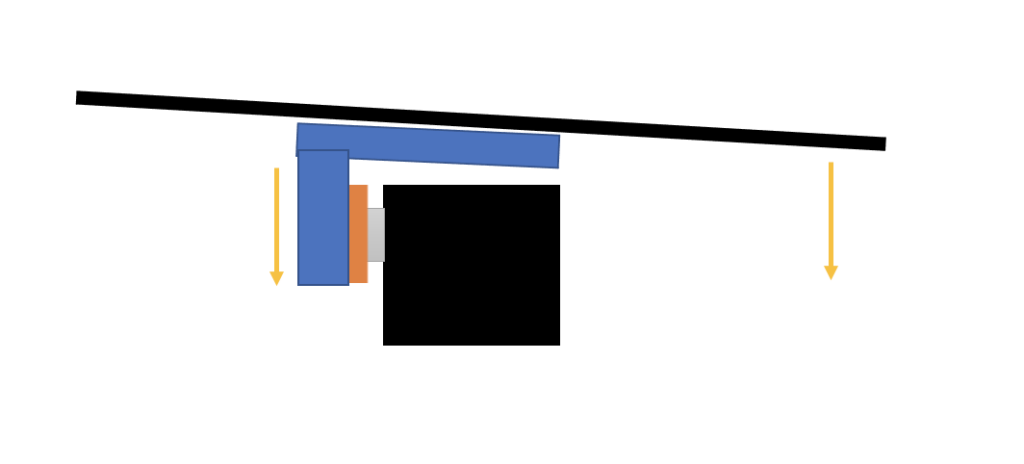
Yes I have painted the bed with much too much tilt, but I believe this is what will happen. Beside the fact there is another problem I think is as important. The rail slider has 4 screws only. And I think for a stable connection to the bed we need more than 4 screws. I think for this kind of moving bed we need minimum 5 screws to have a non moving and none wearing out design. Further, there is a force on an area (the side where there is no rail) which needs to be also covered by the same rail slider. I think this design is not stable, and will not provide the performance we need to have perfect prints for a long time.
1 rail on top of the aluminium profile
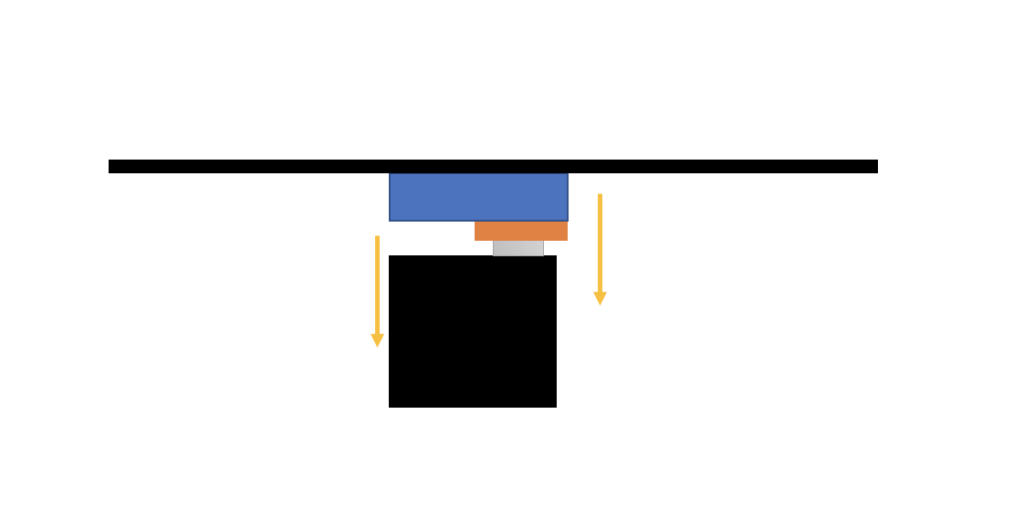
I think this design provides a bit better force distribution but still is not enough to create the stability we want. It still has an unequal distribution of forces on the slider and – because it is only one slider, it again only results in 4 screws. Now those screws – as they are in 90 degree direction of the bed movement, will become unstable and wear out in a bad way through time. I do not believe here as well that this design will provide what we need.
Comment: I did not measure those things of those 1-rail designs. This is pure thoughts and reasoning of basic understanding of physics.
2 rails – each one on one side of the aluminium profile
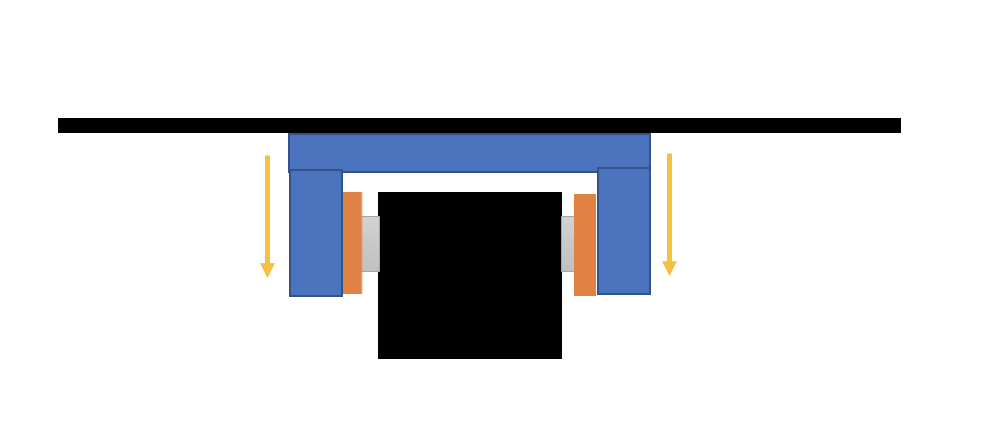
This is my design of choice. I think it provides an amazing stability and durability and offers the best of all choices with respect to distribution of forces as it is absolutely balanced and equal on both sides. It also has 8 screws connecting the bed indirectly with the sliders. Each slider 4 screws. And the screw direction is parallel to the Y movement force which provides overall the best durability.
Yes this design is a bit more costly as it requires 2 rails and 2 sliders.
For my design I am using:
2x MGN12H
2X MGNR12C rails 30 cm
I think you can achieve the same with MGN9H. But as the Y axis is a very sensitive part I rather recommend the 12H rail design.
So here is the connection block which connects the rail sliders with the bed-carrier and which also connects both sides directly. It need to be printed in ABS.
Y Drive 2-Rail Carrier

I like to point out the strengthener cells I have added to the design to create a better stability. You see in the top area, there are 2 layers of around 0.5mm holes in 2 directions horizontally. Thus are breaking the filing of the slicer and add a much higher stability to the design.
Y-Drive Belt Fix Clamps (print 2x)
The Y-Drive Belt Fix clamps attach the belt ends to the Carrier.
Adaption
Please see my YouTube Video for how to adapt the design to your hole setup of your Ender3v2.

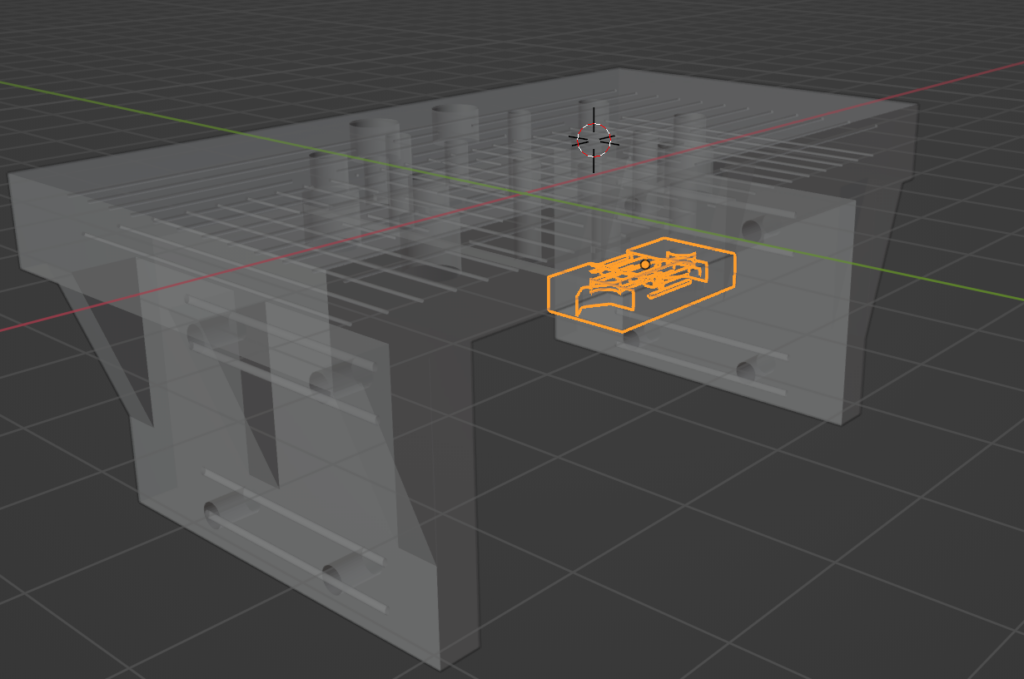
So that you can easily adapt my design files using blender, I have added here 3 more files which you can combine the way you need them, in order to fit your design. The first is the main Block, without the Screw and Thread holes.

Installation
I will provide the installation instructions in the next few days. Please stay tuned.
5 responses to “Ender 3-v2 Re-Engineered – Part2: Precision Y-Rail”
I read this article fully concerning the comparison of most up-to-date and earlier
technologies, it’s remarkable article.
Thank you so much. Sorry that I am currently sporadically online… I will update more soon. Just wish the days have 48 hours 🙂
Thank you. Happy that you like it. Unfotunately I was very busy in the last months with my job… so I am trying to put more on now… getting a bit more relaxed 🙂
Wow thanks so much for this, I ordered some cheap rails to try this on my printer. The modification for the z axis also looks really great, was going to try dual lead screws but your printer looks way better
My Z modification will be online now. Sorry I was very busy recently. I am trying to work through all my ideas now slowly…